Design Rectangle Class Program in C Plus Plus
Write a c++ program to design a class Rectangle with
1. Two member variables length and width of type double,
2. default constructor and parameterized constructor.
3. set(double,double) member function to set values of length and width
4. and getArea() member function to calculate area of rectangle object.
5. Write down main() function.
6. Create an object rectangle1 with default constructor. Set its values 5.0 and 3.0. Call getArea() function. Show result. Also create another object rectangle2 by parametrized constructor passing 7.0 and 4.0. Call getArea() and show the result.
Source Code of Design Rectangle Class Program
#include<iostream>
using namespace std;
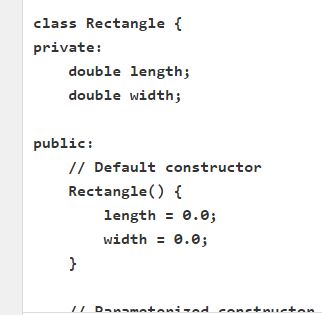
class Rectangle {
private:
double length;
double width;
public:
// Default constructor
Rectangle() {
length = 0.0;
width = 0.0;
}
// Parameterized constructor
Rectangle(double len, double wid) {
length = len;
width = wid;
}
// Member function to set the dimensions of the rectangle
void set(double len, double wid) {
length = len;
width = wid;
}
// Member function to calculate the area of the rectangle
double getArea() {
return length * width;
}
};
int main() {
// Create an object rectangle1 with default constructor
Rectangle rectangle1;
// Set its values to 5.0 and 3.0 using the set member function
rectangle1.set(5.0, 3.0);
// Call getArea() and display the result
double area1 = rectangle1.getArea();
cout << "Area of rectangle1: " << area1 << endl;
// Create another object rectangle2 using the parameterized constructor
Rectangle rectangle2(7.0, 4.0);
// Call getArea() and display the result
double area2 = rectangle2.getArea();
cout << "Area of rectangle2: " << area2 << endl;
return 0;
}
Output:
Area of rectangle1: 15
Area of rectangle2: 28
Explanation of Design Rectangle Class Program in C Plus Plus
- The program starts with an
#includedirective to include the necessary input-output library (<iostream>) which provides functionality for input and output operations. - A class named
Rectangleis defined. It has private data memberslengthandwidthto store the dimensions of the rectangle. - The class has three member functions:
- The default constructor initializes
lengthandwidthto 0.0. - The parameterized constructor takes two arguments and sets
lengthandwidthto those values. - The
setfunction allows you to set the dimensions of the rectangle.
- The default constructor initializes
- The
getAreafunction calculates the area of the rectangle (length * width) and returns the result. - In the
mainfunction:- An object
rectangle1of theRectangleclass is created using the default constructor. - The
setmethod is used to set the dimensions ofrectangle1to 5.0 and 3.0. - The
getAreafunction is called onrectangle1to calculate and display its area.
- An object
- Another object
rectangle2is created using the parameterized constructor with dimensions 7.0 and 4.0. - The
getAreafunction is called onrectangle2to calculate and display its area. - The program ends by returning 0, indicating successful execution.
When you run this program, it will output the areas of the two rectangles based on the provided dimensions. It demonstrates how to create a class, define constructors and member functions, and use objects to perform calculations in C++.
Rectangle class with member variables length and width, a default constructor, a parameterized constructor, and the set and getArea member functions. In the main() function, we create two Rectangle objects: rectangle1 using the default constructor and rectangle2 using the parameterized constructor. We set the dimensions of rectangle1 using the set member function and then call the getArea function on both objects to calculate and display their areas. ![]()